> For the complete documentation index, see [llms.txt](https://docs.oort.io/llms.txt). Markdown versions of documentation pages are available by appending `.md` to page URLs; this page is available as [Markdown](https://docs.oort.io/integrations/github.md).
# Github
2025.11.17
{% hint style="warning" %}
The Identity Intelligence Github integration is currently being moved away from it's previous classic PAT installation to a Github app installation, which is currently in Beta. \
\
New PAT installations have been disabled, and existing Github integration customers will soon be notified to start migrating to the new installation method.
{% endhint %}
## Overview
Identity Intelligence can connect to Github Enterprise tenants and provide insights into user identities and activity on that platform.
This document will walk you through the process of setting up access from Identity Intelligence to Github Enterprise.
### Requirements
The following requirements are necessary for the Github integration -
1. Github Enterprise subscription
1. The integration currently does **NOT** support GitHub Enterprise Managed Users (EMU)
2. A Github **Enterprise admin account** capable of creating and installing [Github Apps](https://docs.github.com/en/enterprise-cloud@latest/admin/managing-github-apps-for-your-enterprise/creating-github-apps-for-your-enterprise) on the enterprise.
3. SSO from your Identity Provider to **each** Github org is set to "Enforced" (mandatory) and **not** "Configured" (optional), otherwise Identity Intelligence cannot retrieve the emails for users in the "configured" org and they will not merge with their own record in the "enforced" org.
## Github API Permission Structure
### Enterprise vs. Org
Identity Intelligence has chosen to connect to Github environments at the Enterprise level rather than per Organization. This allows for the use of one Github app for an entire customer environment, instead of a Github app being required for each Org.
Therefore, an Enterprise Admin account or an Enterprise service account is required.
### Only Include Specific Github Orgs
Please see [Github Configuration Steps, step 8](#github-configuration-steps) to see how to configure Identity Intelligence to only collect the data for specific orgs under your enterprise.
### Compatible Checks
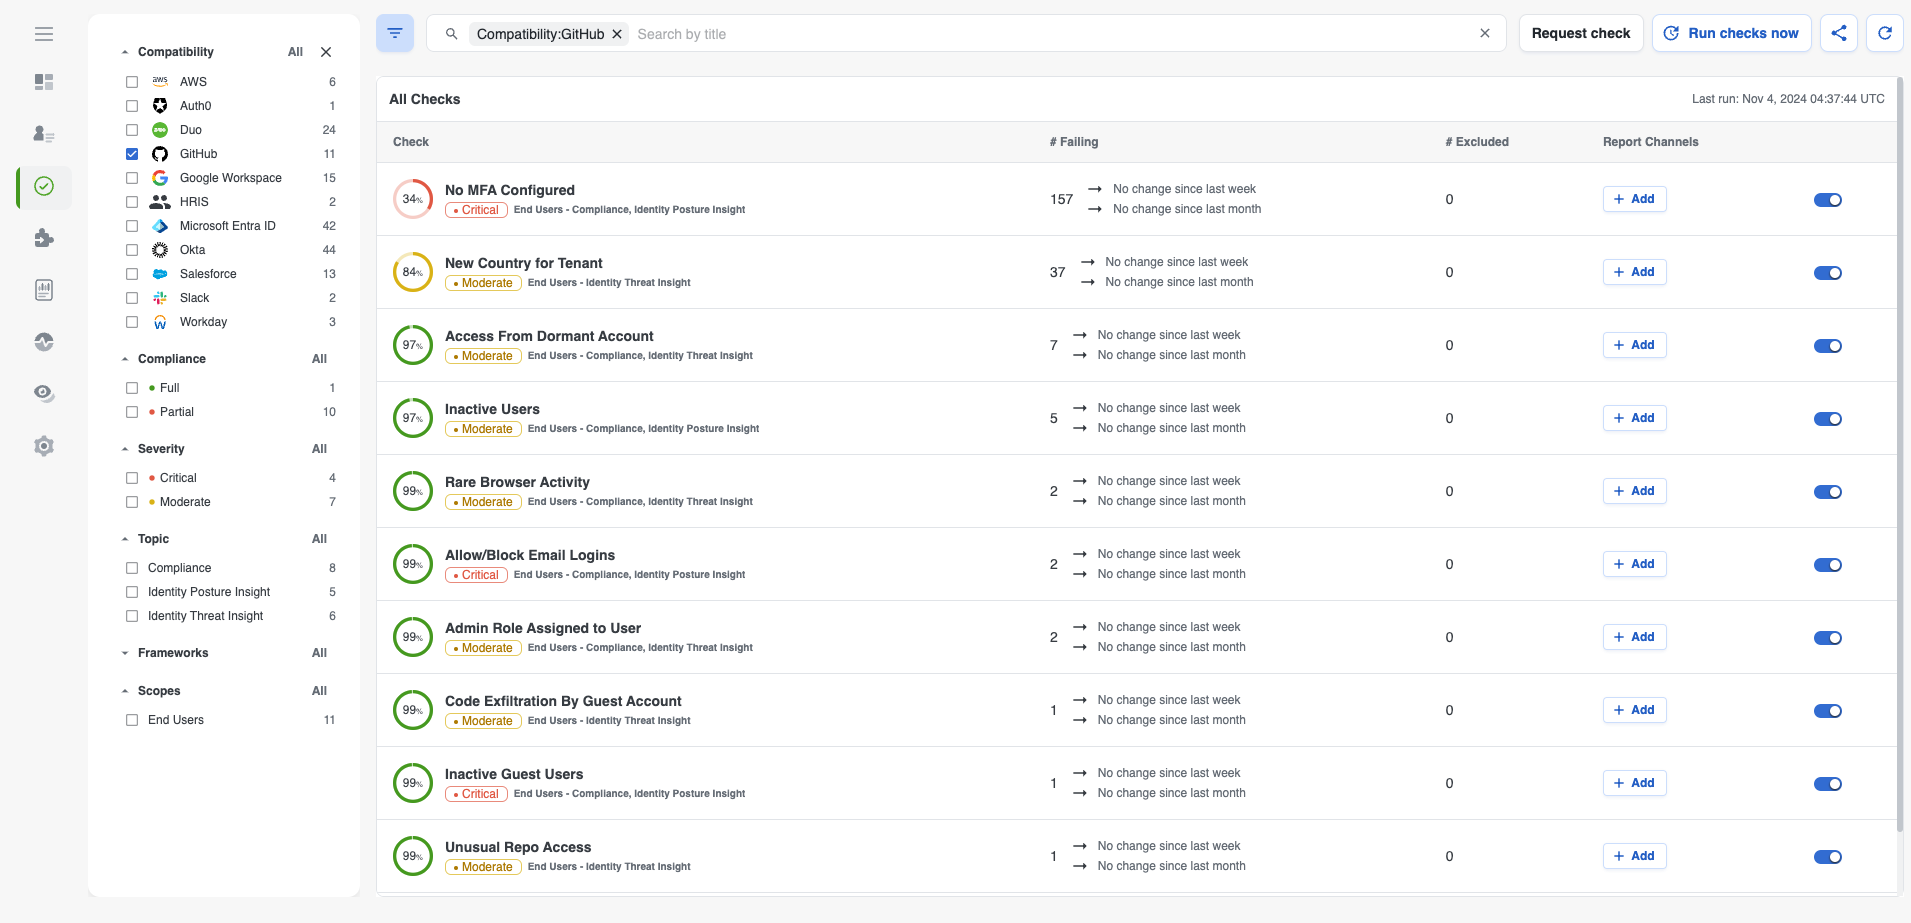
Currently, 17 security posture and threat detection Checks are compatible with the Github integration. Identity Intelligence is continuously adding to this list, based on customer requests and also new and emerging identity-based threats for Github.
## Github Configuration Steps
1. Login to Github with an **Enterprise admin account.** If you navigate to [Github.com/settings/enterprises](https://github.com/settings/enterprises), it should look something like the following:
2. Enable **displaying IP addresses in the Github Audit Log** for your enterprise tenant as described in [this article](https://docs.github.com/en/enterprise-cloud@latest/admin/monitoring-activity-in-your-enterprise/reviewing-audit-logs-for-your-enterprise/displaying-ip-addresses-in-the-audit-log-for-your-enterprise#enabling-display-of-ip-addresses-in-the-audit-log)
3. Follow the steps for registering a GitHub app as outlined in this [Github article](https://docs.github.com/en/enterprise-cloud@latest/apps/creating-github-apps/registering-a-github-app/registering-a-github-app)
1. In step 2 make sure you follow the directions for apps owned by an enterprise.
2. In step 7 enter the URL to your Identity Intelligence dashboard.
3. Skip steps 8-13.
4. Complete step 14 to disable the webhook.
5. For step 18 configure the following permissions (note: all of these scopes are read-only unless otherwise mentioned):
* Repository permissions:
* Administration
* Dependabot secrets
* Secrets
* Organization permissions:
* Administration
* Blocking users
* Custom organization roles
* Custom repository roles
* GitHub Copilot Business
* Members
* Organization dependabot secrets
* Personal access tokens
* Secrets
* Enterprise Permissions:
* Custom enterprise roles
* Enterprise AI controls
* Enterprise custom organization roles
* Enterprise organization installation repositories (**read and write** for automatic organization installation; otherwise optional)
* Enterprise organization installations (**read and write** for automatic organization installation; otherwise optional)
* Enterprise people
* Enterprise single sign-on
4. Once you have registered your new app you will need to generate and save a private key. Once you generate the key, the file should automatically be downloaded for you. Save this key as you will need to input it into Identity Intelligence later
5. Press **save changes** in the Github app screen. In the **general** page, note the **app ID** at the top of the page, as you will need this later
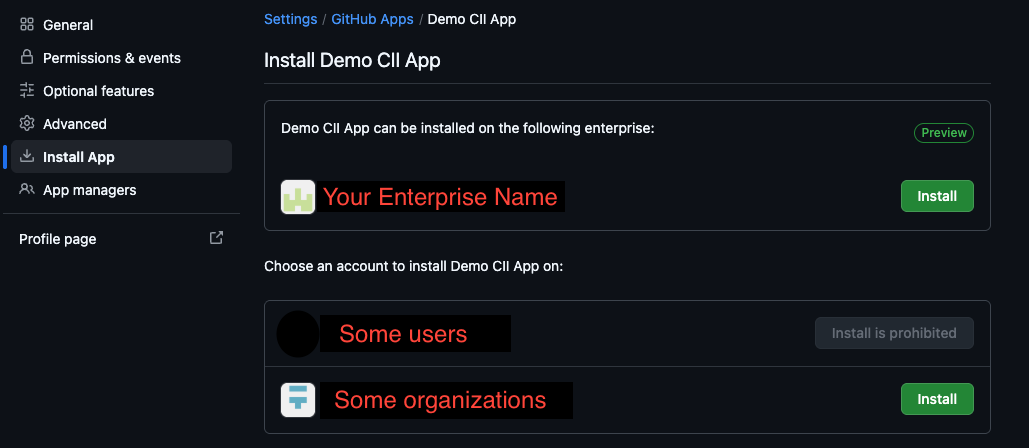
6. Go to the **Install App** page inside your new app. Your screen should look something like this:
7. Press **install** on your enterprise and accept the permissions that you configured in step 3.
8. Choose how the app is installed on organizations in your enterprise using the options below. On initial install, **we *****highly recommend*** installing only a small subset of Github orgs to start, to confirm the configuration is working properly and the results are as expected, and then expanding to cover all your Github orgs when everything appears stable
* **Automatic installation:** The **Enterprise organization installation repositories** and **Enterprise organization installations** permissions must both be set to **Read and write**.
* **Manual installation:** If you do not grant these read/write permissions, go back to the **Install App** screen in the Github app's settings and install it on every organization you would like Identity Intelligence to monitor.
9. Note the **slug** for your Enterprise Github tenant. This can be found under your enterprise profile tab.
## Identity Intelligence Configuration Steps
Sign in to your Identity Intelligence tenant and perform the following steps:
{% hint style="info" %}
If you installed your Github app on multiple **Github enterprises** you will have to repeat this section once per enterprise.
{% endhint %}
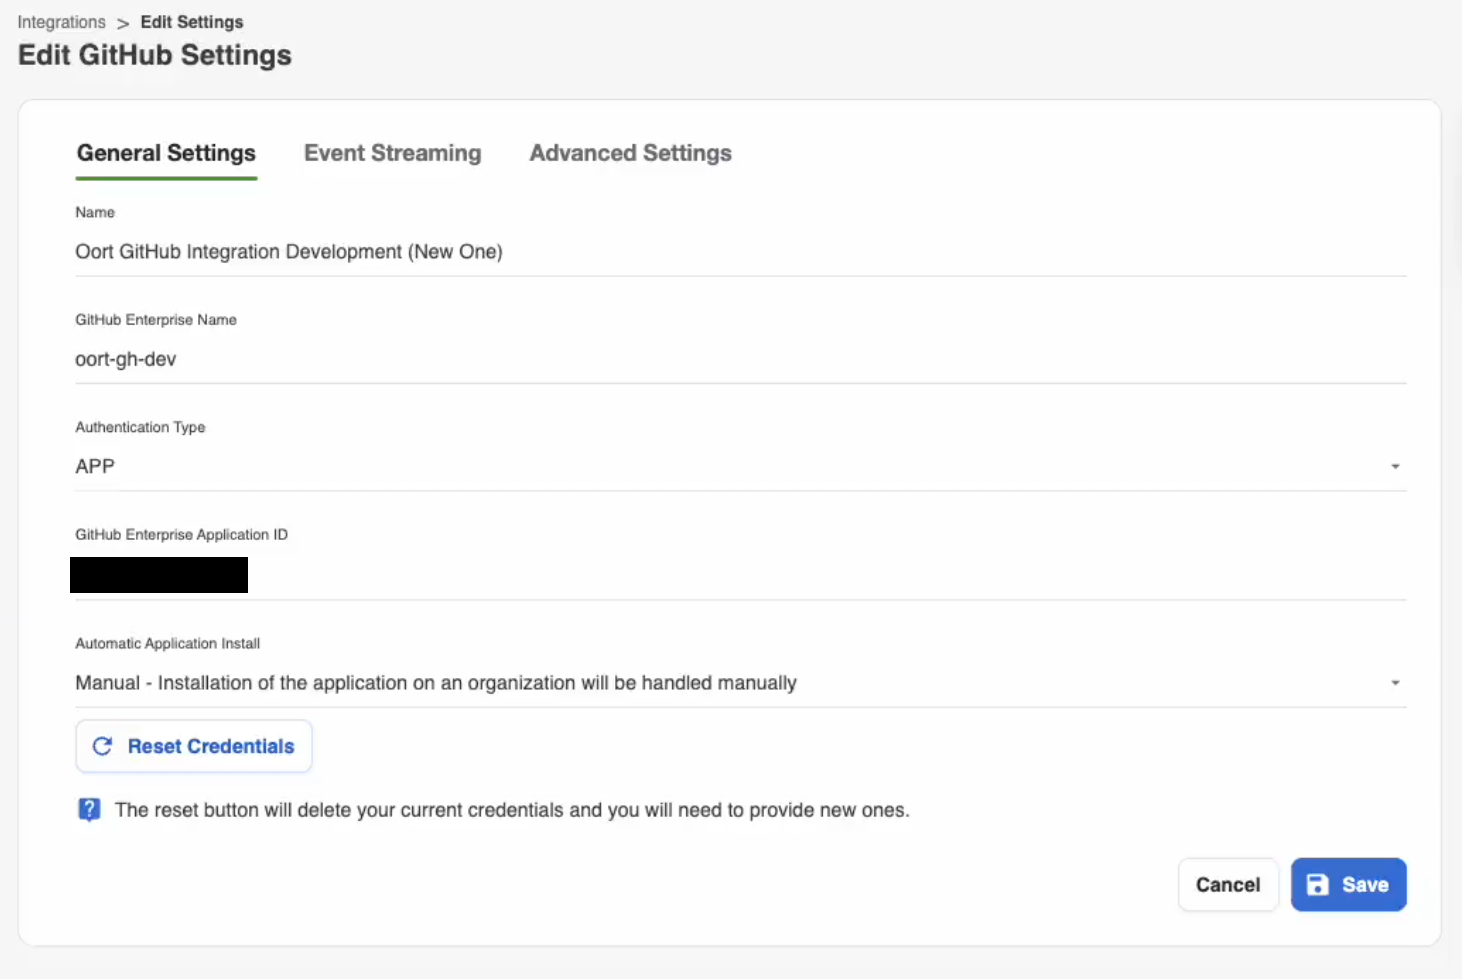
1. From the Integrations page, click **Add Integration** and select **Github**.
2. Enter a display name for the integration, such as *Github \*.
3. Enter the value of your Github Enterprise slug, obtained in Step 9 above.
4. If you are migrating to the app installation type, select **app** as the authentication type. Otherwise, this will automatically be done for you.
5. Enter the Github app's application ID from step 5 above.
6. Enter the Github app's secret value that was downloaded for you in step 4 above.
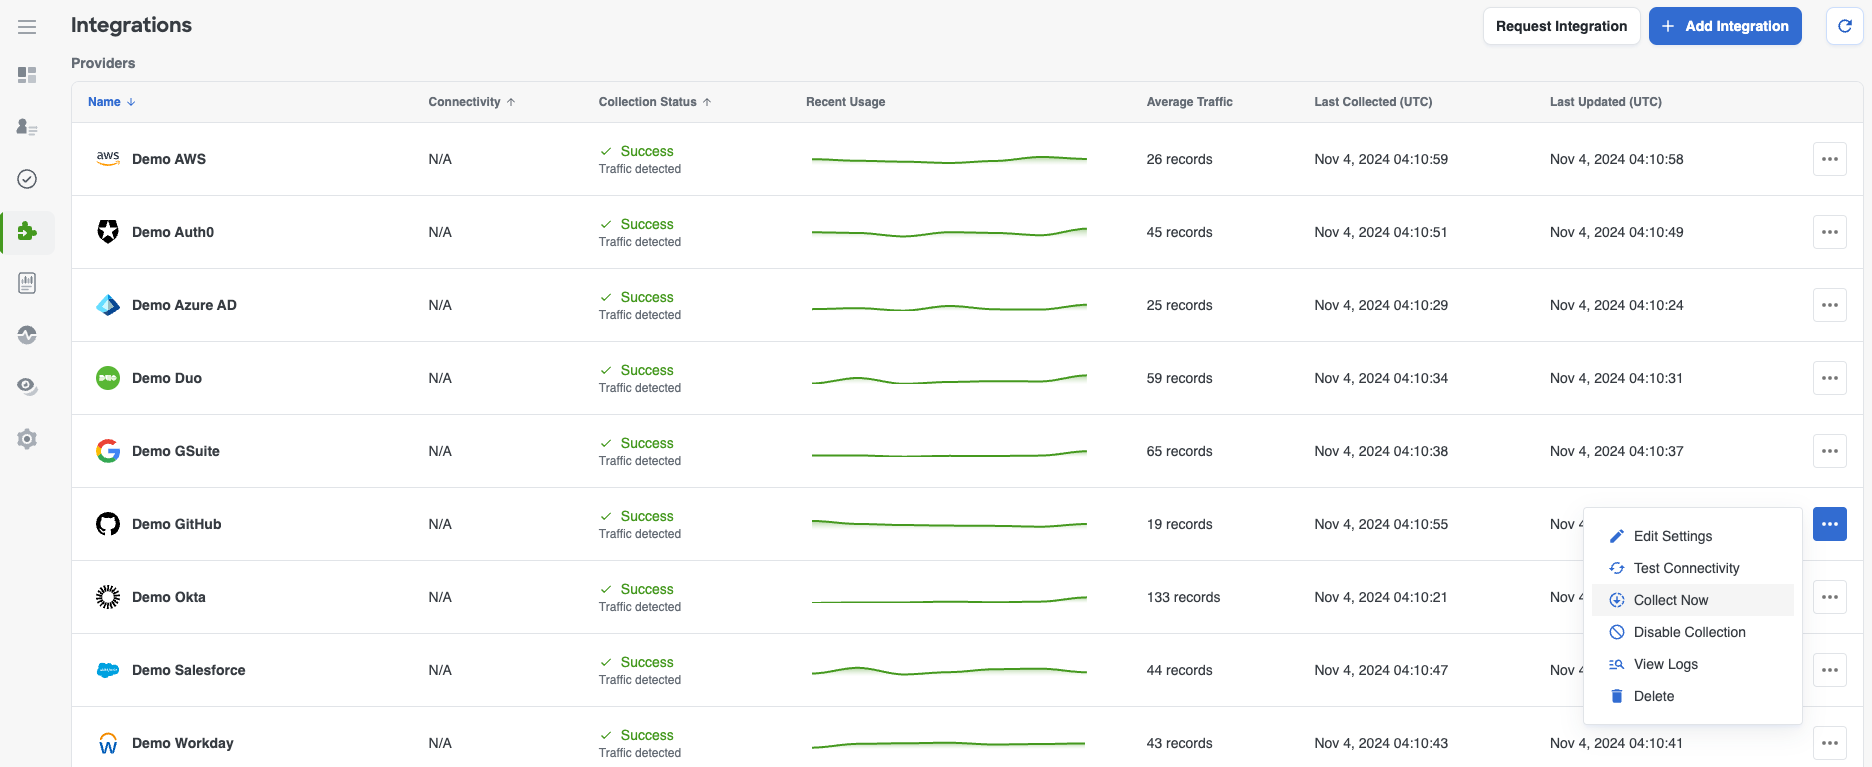
7. Once the configuration connection is successful, go back to the main **Integrations** page, click the 3-dot menu on the Github integration and select **Collect Now**. Collection may take some time, depending on the size of the environment.
## Github Event Streaming (Beta)
{% hint style="warning" %}
GitHub has no plans to take audit log streaming out of private beta. So if you are not already in the beta program you will not be able to use this feature.
{% endhint %}
Github has the capability to [stream the audit log events](https://docs.github.com/en/enterprise-cloud@latest/admin/monitoring-activity-in-your-enterprise/reviewing-audit-logs-for-your-enterprise/streaming-the-audit-log-for-your-enterprise). This is currently in Beta. If you do not see the option in your Github Enterprise tenant, contact your Github representative.
Note: The Github base configuration above must already be completed. This step is highly recommended.
1. Within CII, navigate to Integrations and click **Edit Settings** on the existing Github integration.
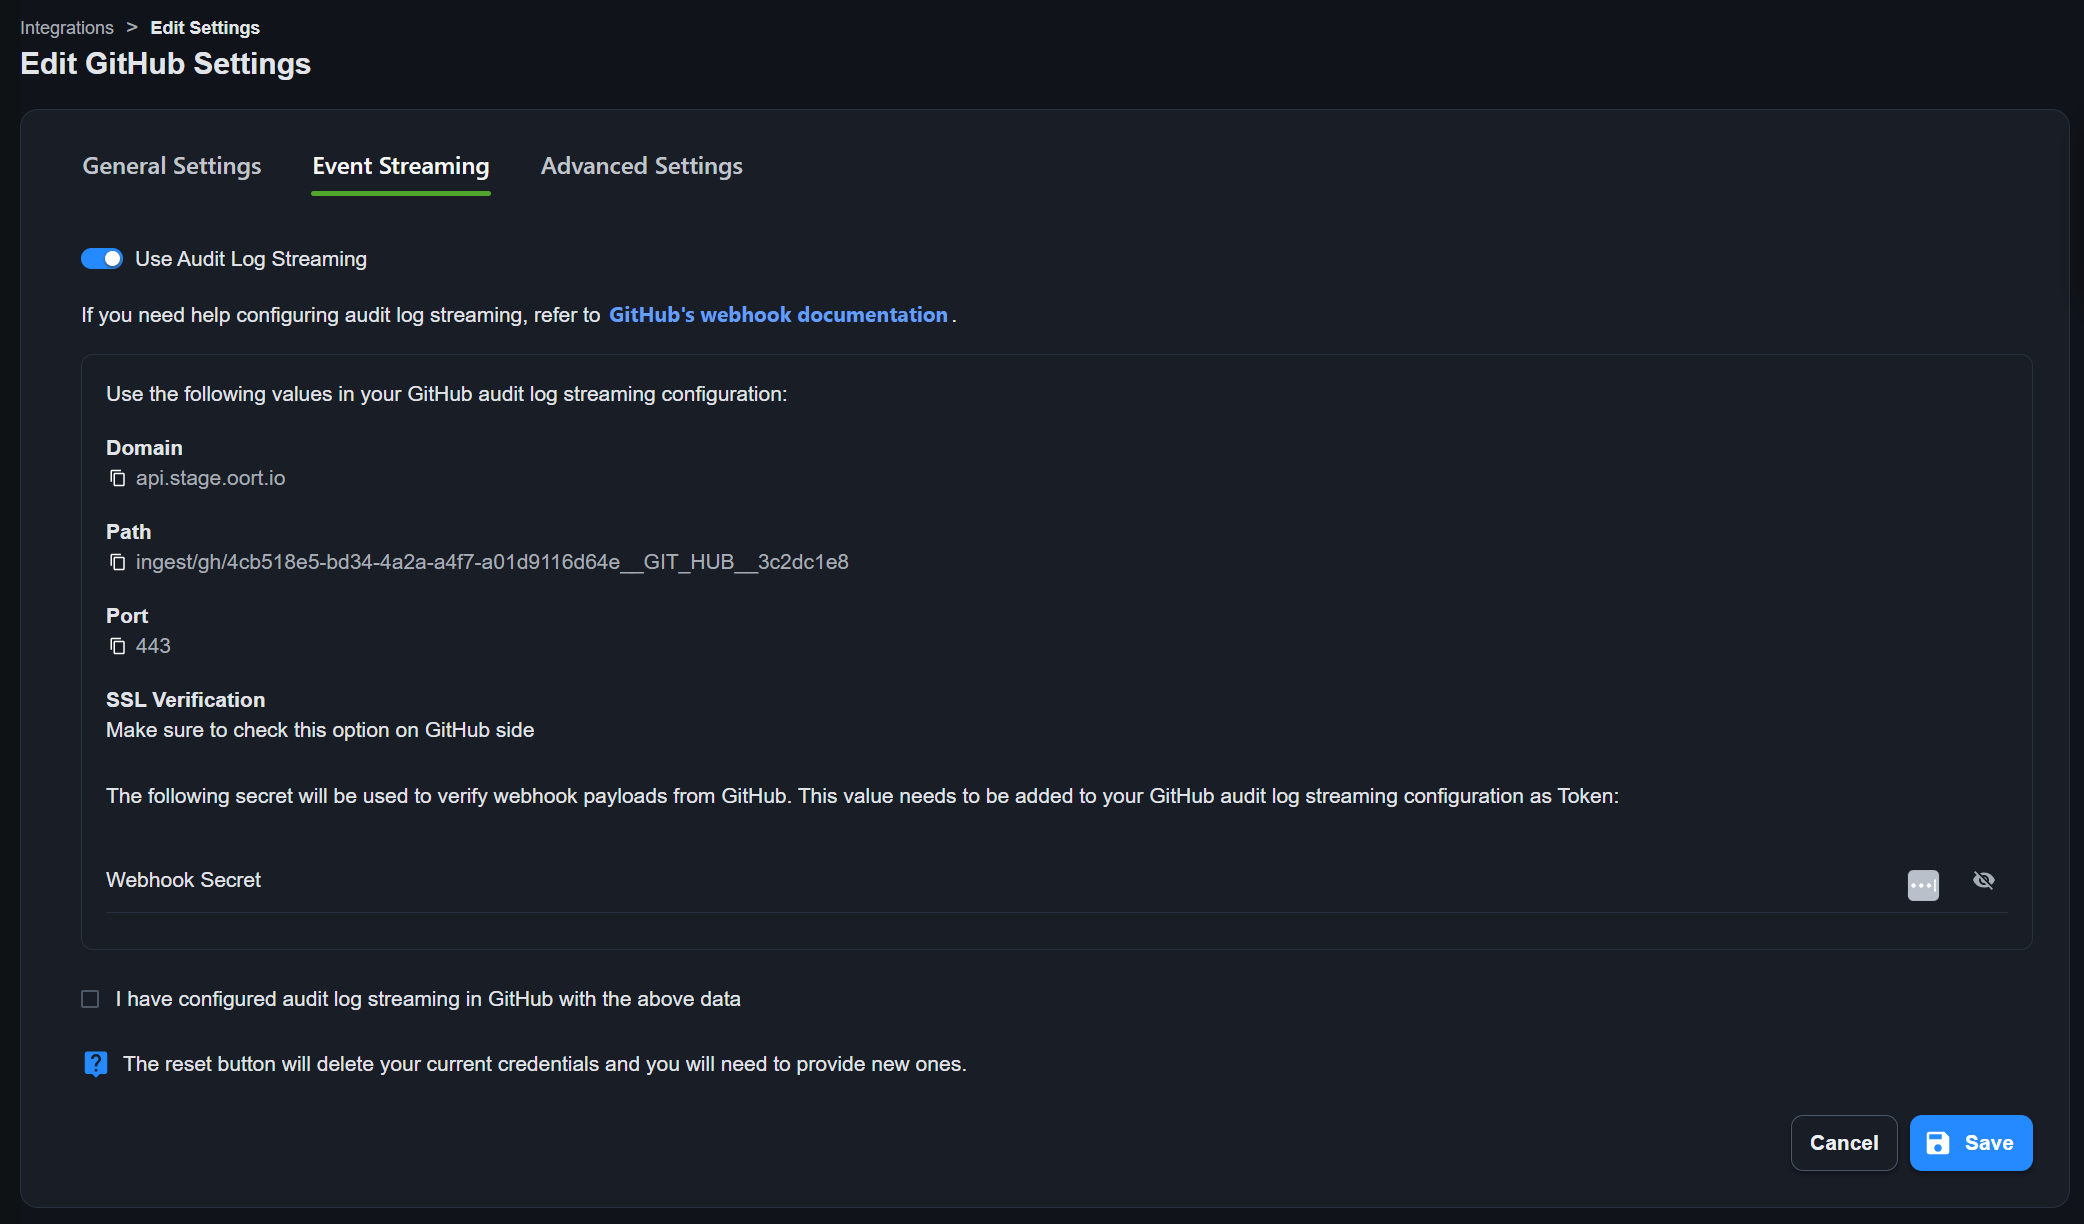
2. Click the **Event Streaming** tab.
3. Slide the button to **Use Audit Log Streaming**.
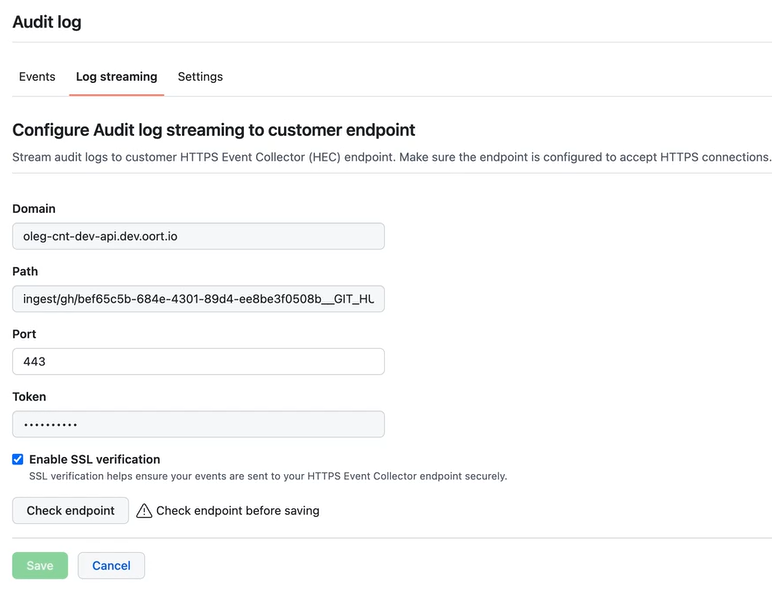
4. Note the **Domain**, **Path**, and **Port** information for use in the Github setup.
5. Create a strong value for the **Webhook Secret** and enter it in the config.
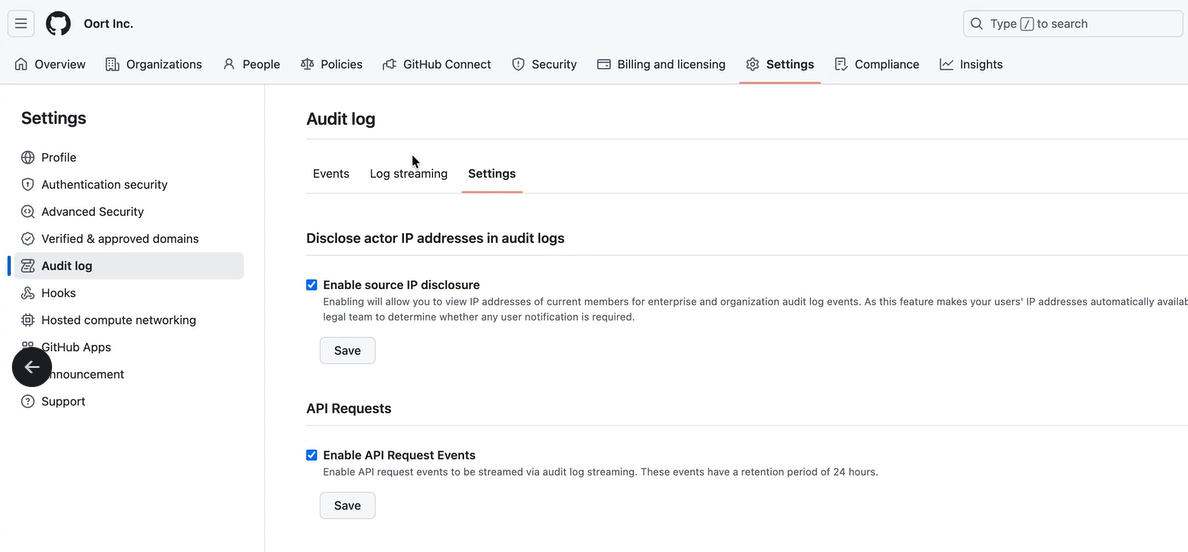
6. Within Github, navigate to **Settings** > **Audit Log** > **Settings**. Ensure that `Enable API Request Events` is checked.
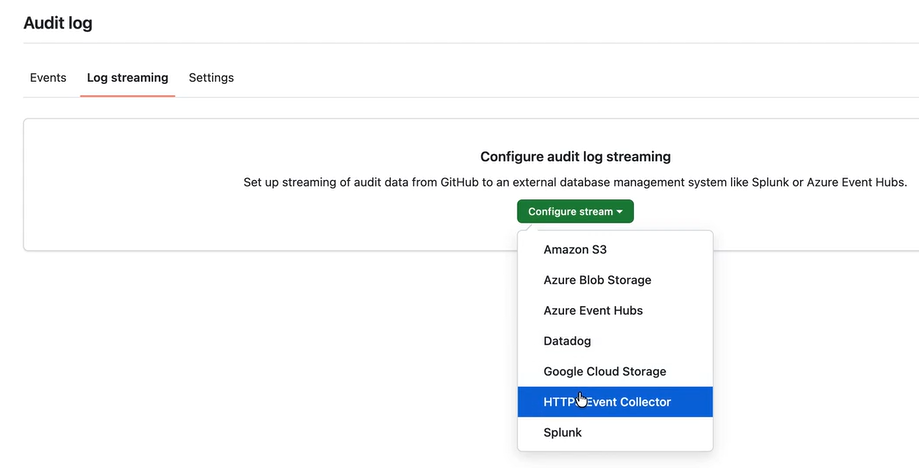
7. On the **Log Streaming** tab, select `HTTP Event Collector` from the **Configure stream** dropdown list.
8. Enter the **Domain**, **Path**, **Port**, and **Token** (Webhook secret above).
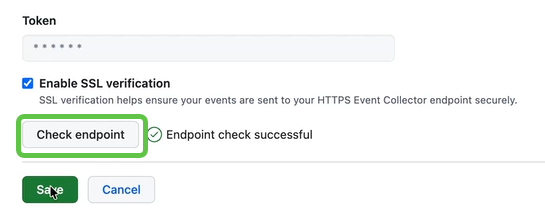
9. Check the `Enable SSL verification` button.
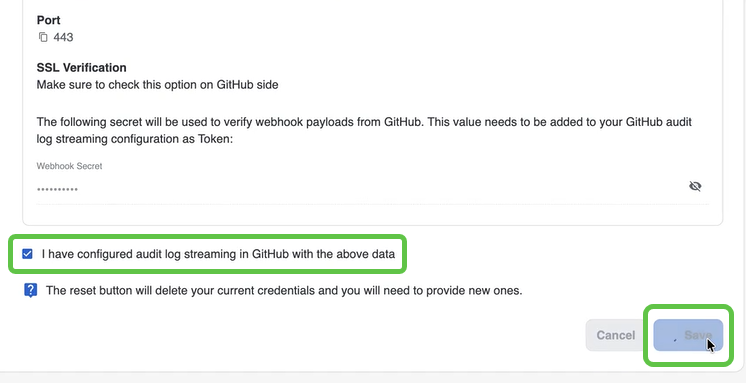
10. Back in the CII integration settings, click the checkbox to confirm that you have configured Github streaming in that platform and then click `Save`.
11. Back on the Github streaming configuration page, click the `Check endpoint` button. Once successful, click `Save`.
12. That's it. It should be all set.
.png?alt=media&token=ffe86761-f5df-4d80-bd35-f5ded7e53969)